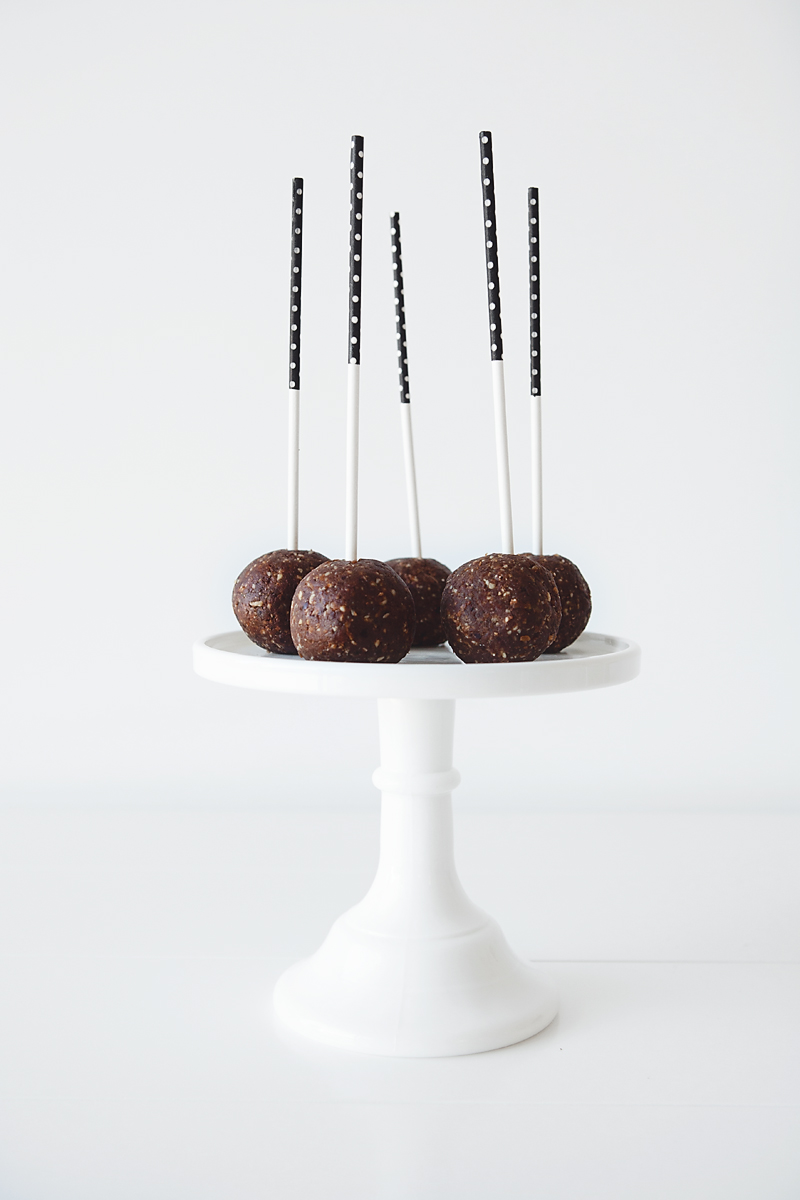
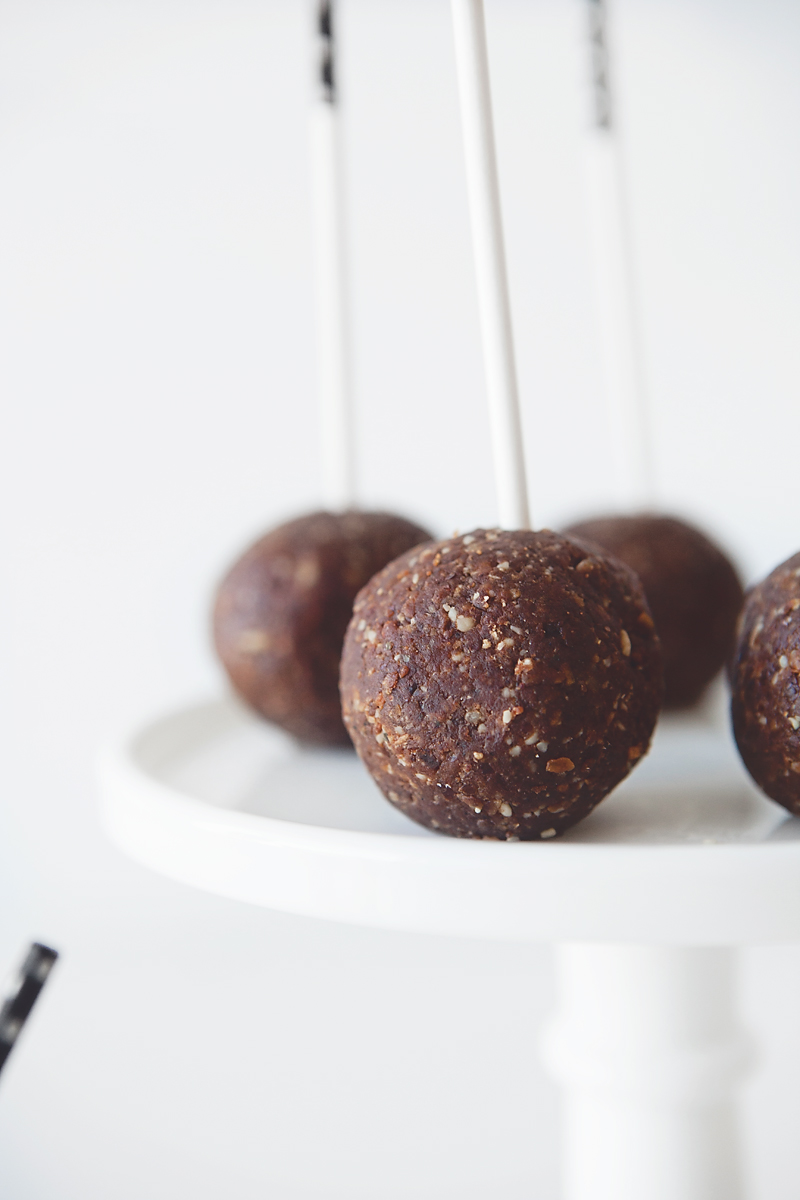
I have more great low sugar party food to share with you today. These perfect little party treats are called bliss balls and are the perfect addition to your party table.
Made with dried fruit, nuts and coconut they tick all the boxes for a healthy treat and when rolled into these balls they are the perfect on a cake stand. To take it even further just add one of these pretty sweet sticks to tie it in with your party theme and you have a stylish healthy cake pop (minus the cake).
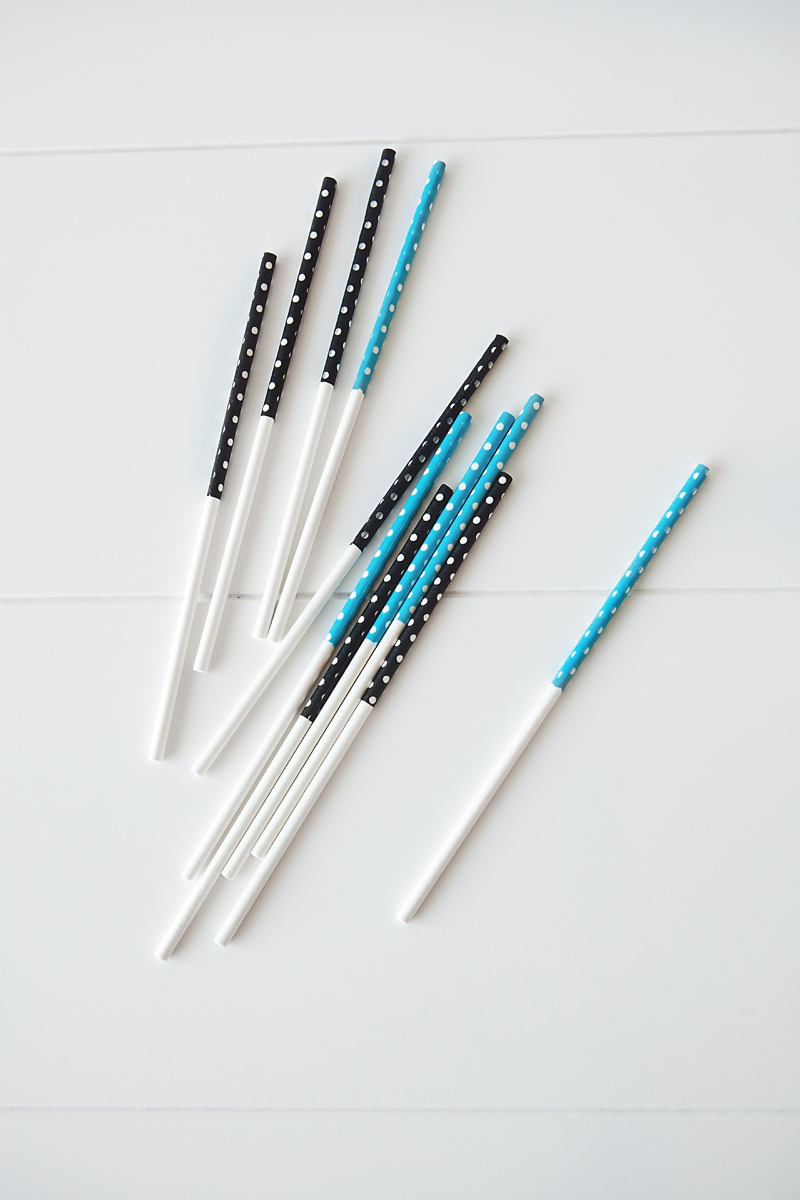
These sweet sticks are the perfect addition to your bliss balls to give them a party feel! What kid (or adult) doesn’t love eating their dessert from a stick.
You can find these lovely sticks at Emiko Blue here – they come in a range of lovely colours.
I have a simple and delicious no sugar recipe to share with you today courtesy of talented blogger and photographer Chantelle Grady of The Grounded Kitchen.
I have been a long time follower of Chantelle’s original blog which she recently took a little break from. Just like me she has recently taken a close look at the health of her family and is now back with a wonderful new blog called The Grounded Kitchen, where she shares the wonderful food she cooks for her family.
Today she is here to share with us her great recipe for Salted Nut Butter Cups – I can see these guys added to a sophisticated dessert table or enjoyed as a sweet treat with coffee!
The recipe includes honey and almond butter and my tips for these two items is firstly for the best honey, buy Manuka Pure Honey which is available in the supermarket. The nut butter I buy is from my local bulk health food store where it is made as you ask for it but if in the supermarket look for a pure nut butter and not one that has sugar added to it.
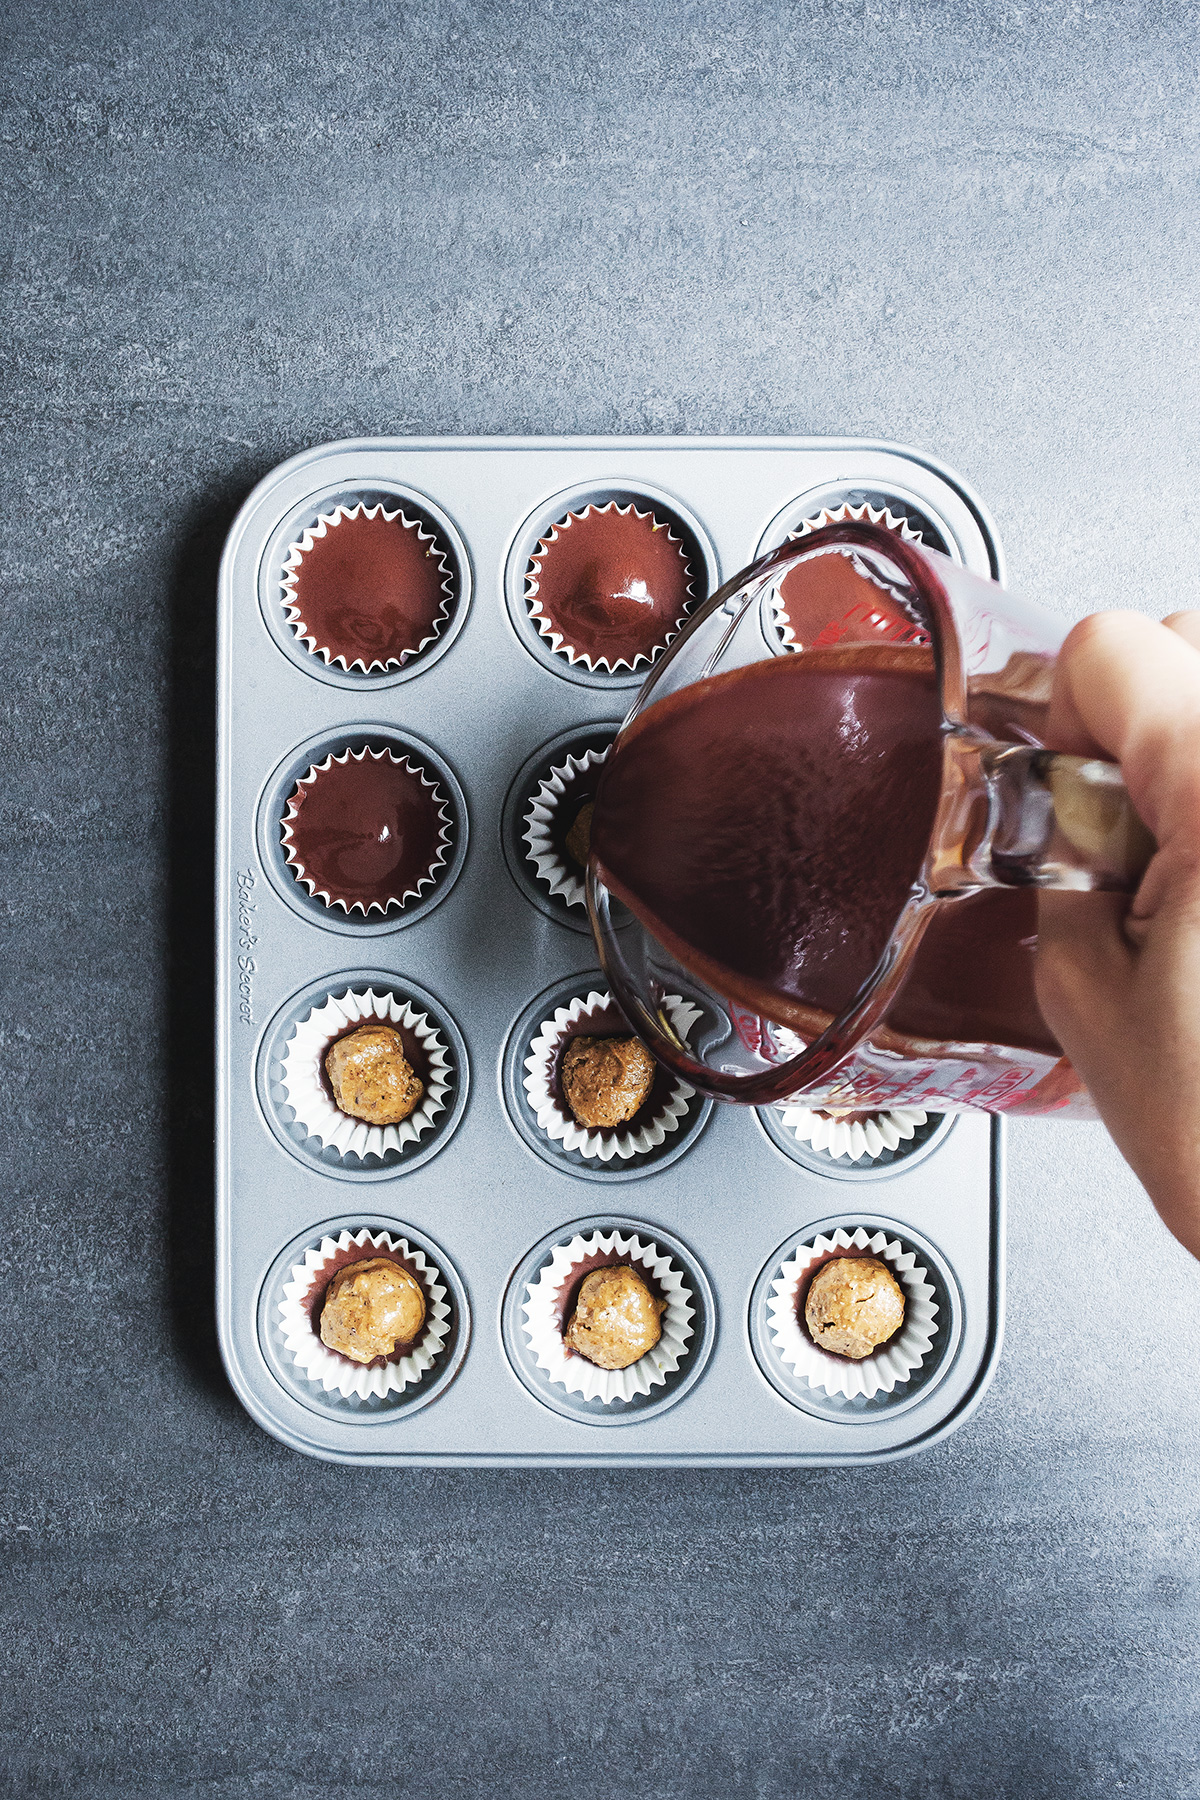
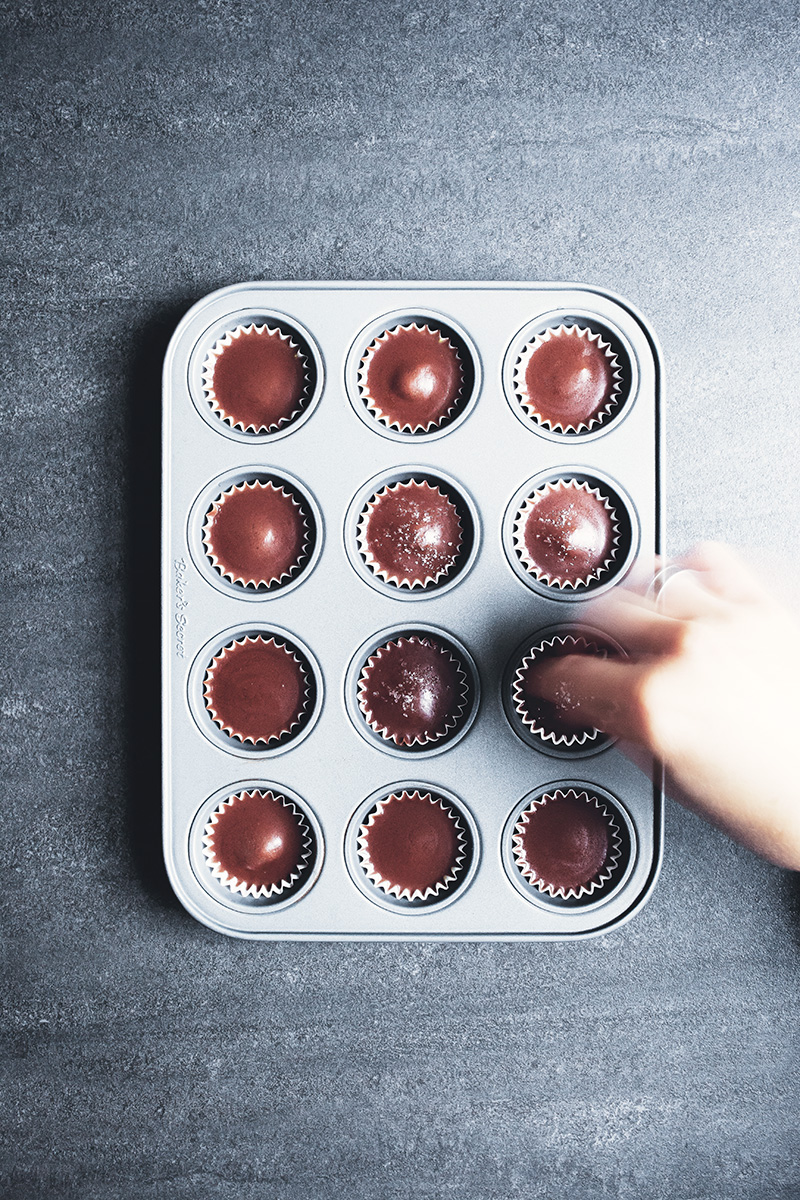
Arrange small paper cups in 2 mini cupcake tins. Or use silicone moulds if you have them.
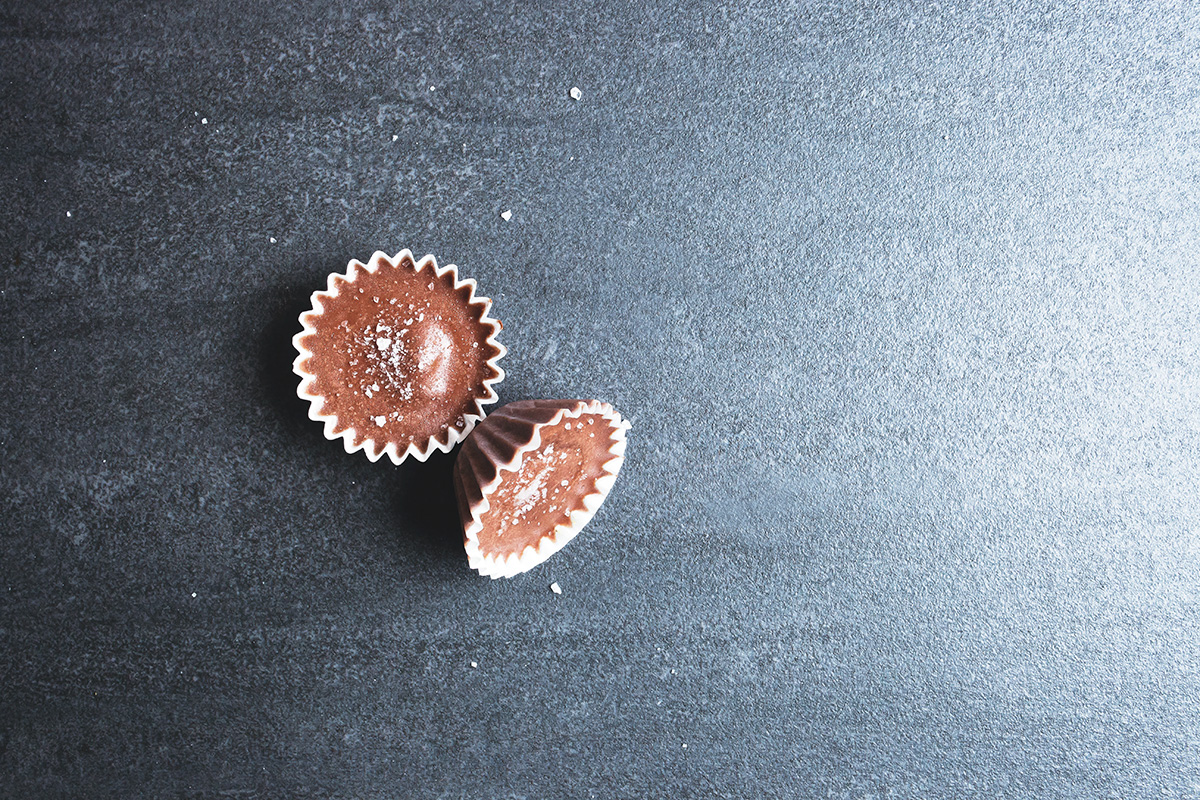
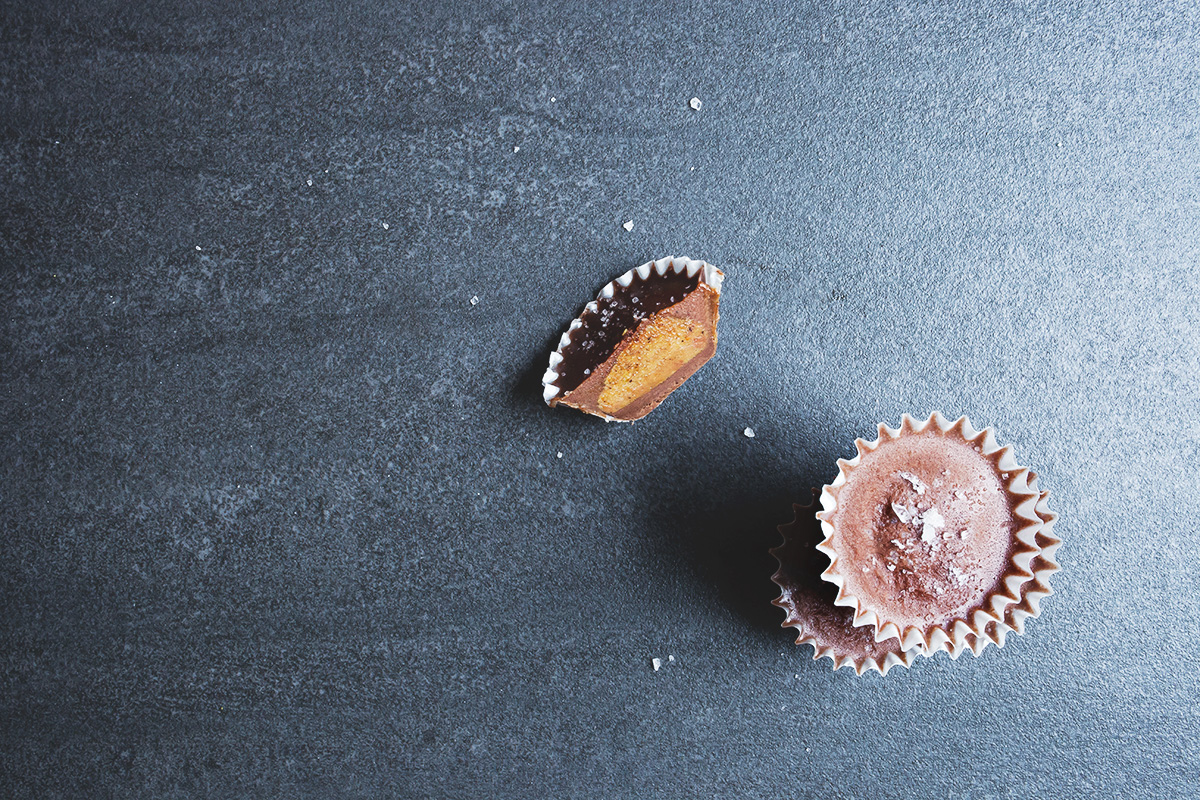
To make the cacao chocolate, place the melted coconut oil, honey, cacao powder, coconut cream and sea salt in a bowl. Whisk together until completely smooth. Drizzle a little of the cacao mixture into the bottom of each paper cup, about 3mm. Place in the freezer while you make the almond butter filling.
Place the almond butter, honey and sea salt in another bowl. Stir until it forms a dough. You might need to use hands to bring it together.
Remove trays from the freezer and roll a small dollop of nut dough between the palms of your hands. Flatten slightly and place into the cups. Repeat until all cups are filled. Drizzle more cacao chocolate into each cup covering the filling. Place back in the freezer for 5 minutes to set slightly before pulling them back out again to sprinkle with extra sea salt. Refrigerate until completely set, about 1 hour.
Store in the refrigerator.
Sweet Style http://www.sweetstyle.com.au/
Chantelle Grady is a lifestyle, food and travel photographer from Australia currently living in Berkley, California. Her blog The Grounded Kitchen focuses on wellness recipes.
Gillian is back today to share with us and delicious Apple Berry Pie Recipe
Gillians recipe are always wholesome and include beautiful ingredients – I can imagine serving these beauties to the mums and dads court side after our Saturday morning netball game! Where would you serve these lovely little pies?
700g Granny Smith apples, cored peeled and cut into 2cm cubes
Juice of 1 lemon
150g blackberries
1 tbsp demerara sugar
40g butter
Instructions
Grease a cupcake pan with butter and heat oven to 180C
Put the flour and cinnamon in a food processor, then add the butter. Process to make fine crumbs. Reserve 2 tbsp of the sugar, then add the remainder and briefly mix. Add the egg yolk and 1 tbsp water, then pulse to make a firm dough. Turn out onto a lightly floured surface and briefly knead. Wrap in cling film and chill for 30 minutes.
To make the filling, peel and core the apples, and cut each into 2cm pieces. Toss immediately with lemon juice in a large bowl, to prevent apples from discolouring. Place the butter and sugar in a large frypan over medium-low heat. When butter has melted, add apples and spices, then stir to coat. Cook, stirring occasionally, for 8 minutes or until apples have slightly softened, add blackberries and cook for a further 2 minutes. Set aside to cool.
Roll out pastry to approx 1cm thickness. Cut rounds to fit cupcake pan. Cut smaller rounds for lids.
Gently press rounds into cupcake pan and spoon in cooled fruit mix ( don't be tempted to spoon in hot fruit as this will affect the baking process of the pastry.) Brush a little water on edge of pastry and place lid on top. Brush with milk and sprinkle with some sugar.
Bake for 25 minutes or until pastry is golden brown.
Notes
You can substitute blackberries with any seasonal berries
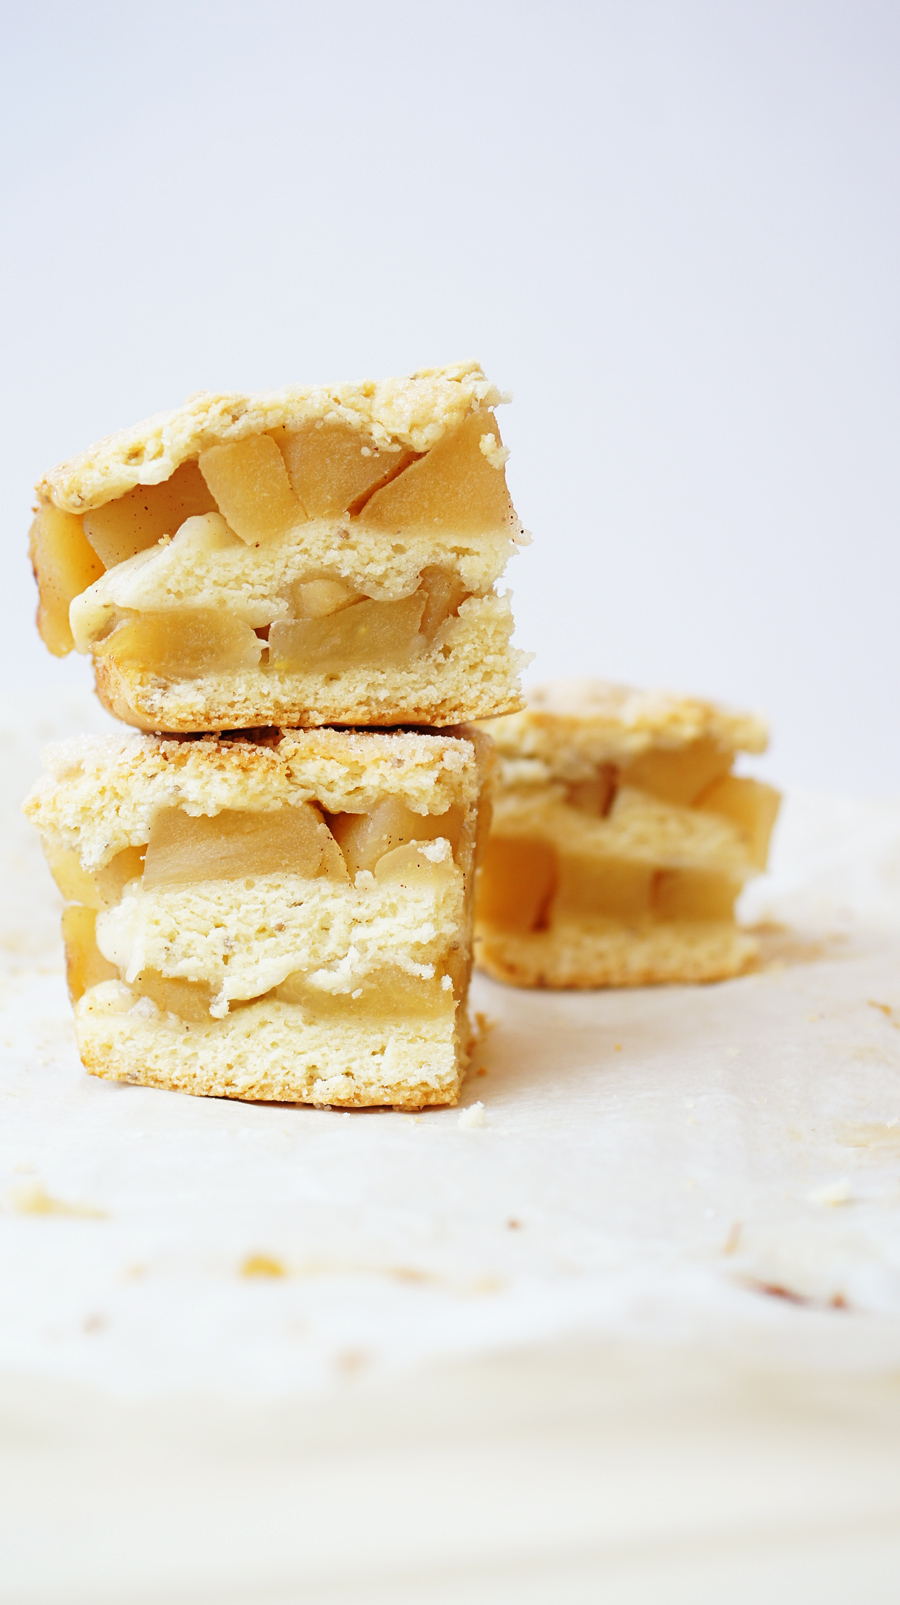
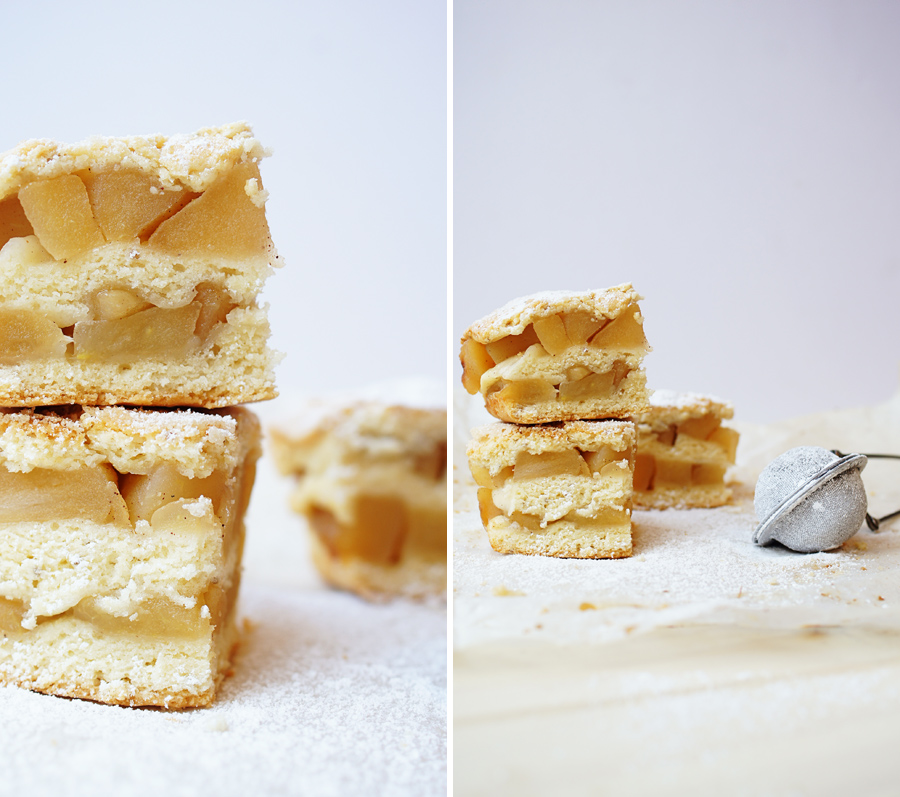
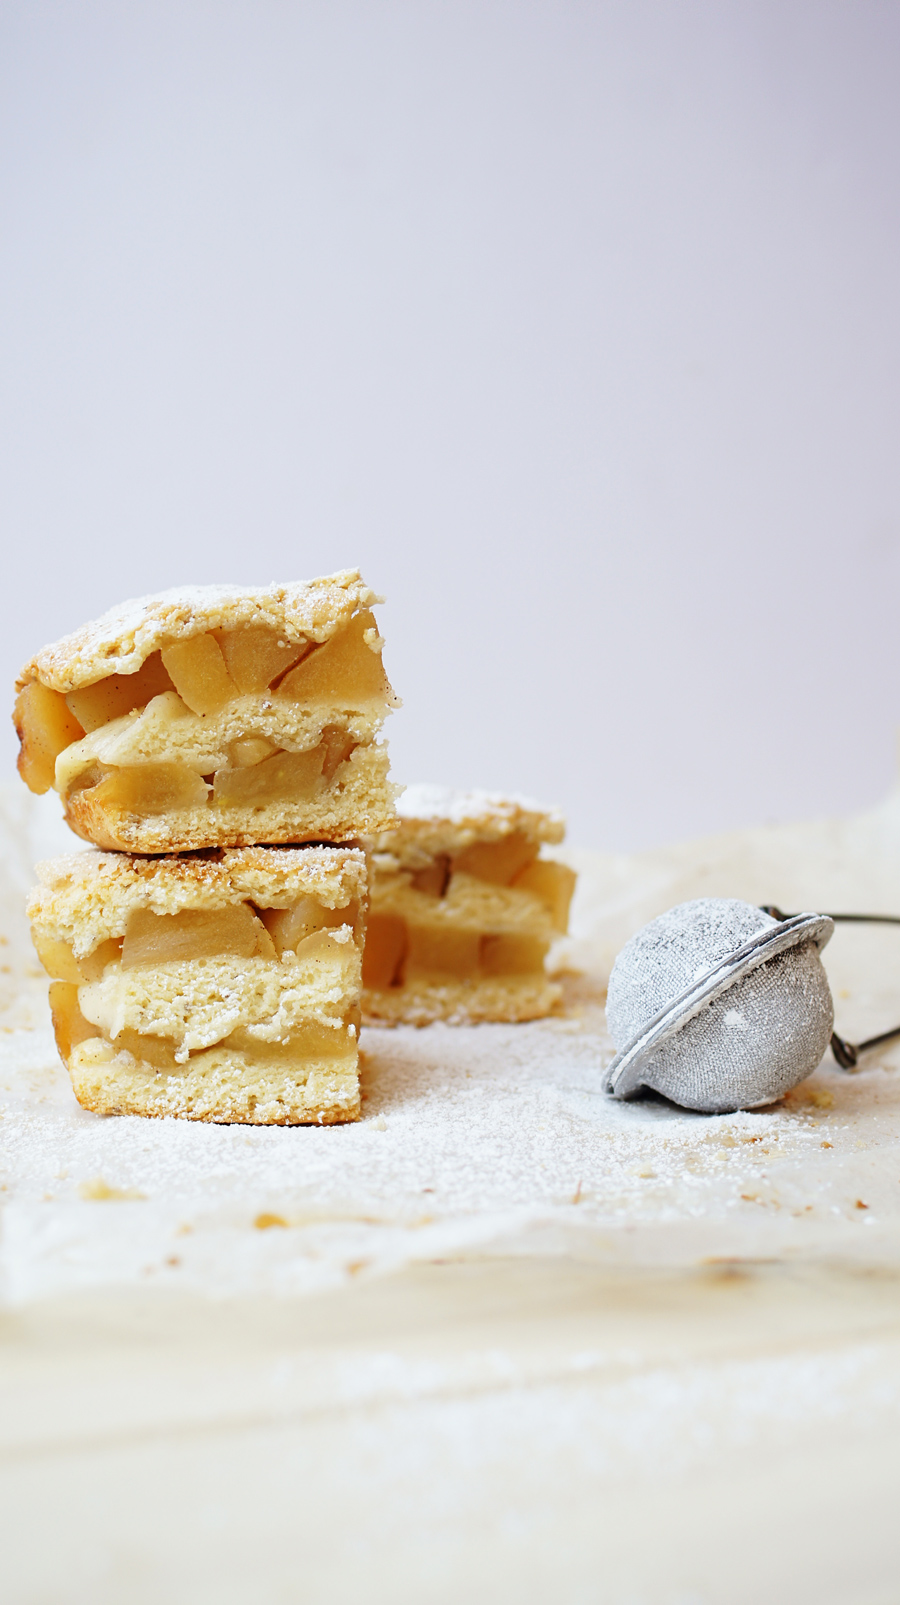
It is recipe day today and Bianca from Botanic Baker Blog is back today to share with us one of her delicious Vegan treats.
This Apple and Cinnamon Slice sounds just amazing and would be the perfect afternoon treat for visitors (or just to treat yourself). The recipe can be found and printed at the bottom of the post – as will all of Bianca’s recipes they can all be made non vegan.
( 1 tbs chia seeds to 3 tbs water, whisk until combine and gel starts to form. Place in fridge for 15 minutes before using)
2 cups stewed apples, with cinnamon*
Instructions
Simply peel, core and dice your apples then place into a large pot or saucepan with a lid. Sprinkle apples with ground cinnamon and a tablespoon of caster sugar.
Pour in ½ cup of water over the top and put the pot onto a medium heat, stirring occasionally until apples become soft but still firm.
Once cooked, strain and allow the apples to cool before placing them into your slice.
Combine all pastry ingredients into a food processor.
Mix until all ingredients are combine, if needed you can add extra milk if dough is not combining.
While your dough is combining, line your slice tray with baking paper.
Once combine place the dough onto a well floured surface and roll into a ball, place in fridge for 5 – 10 minutes.
While dough is sitting in the fridge pre-heat oven to 180°C.
Cut dough into 2 or 3 balls ( this depends on how many layers you wish to make)
On the well floured surface roll your dough balls into roughly 1 cm layers and start to layer your apples and pastry.
Start with a bottom layer of pastry then add your stewed apples(if you like them sweeter sprinkle a teaspoon of caster sugar on to the apples) then layer the pastry. You will need pastry at the top to keep it all together.
Place apple slice in oven and bake for 25 minutes or until the top is slightly golden brown. Once baked place tray onto a wire rack to cool for 10 minutes before taking the slice out.
Once out cut into slices and sprinkle sifted icing sugar over the top.
Sweet Style http://www.sweetstyle.com.au/
Bianca Virtue is the creator and owner of Botanic Baker Blog in Melbourne, Australia. After meeting her vegan husband six years ago she started to create and develop vegan recipes that are easy for everyone. Every recipe can be made non vegan which is the beauty of her recipes. From simples bakes to learning to make something with seasonal produce her passion is sweet treats. She is currently studying Patisserie.
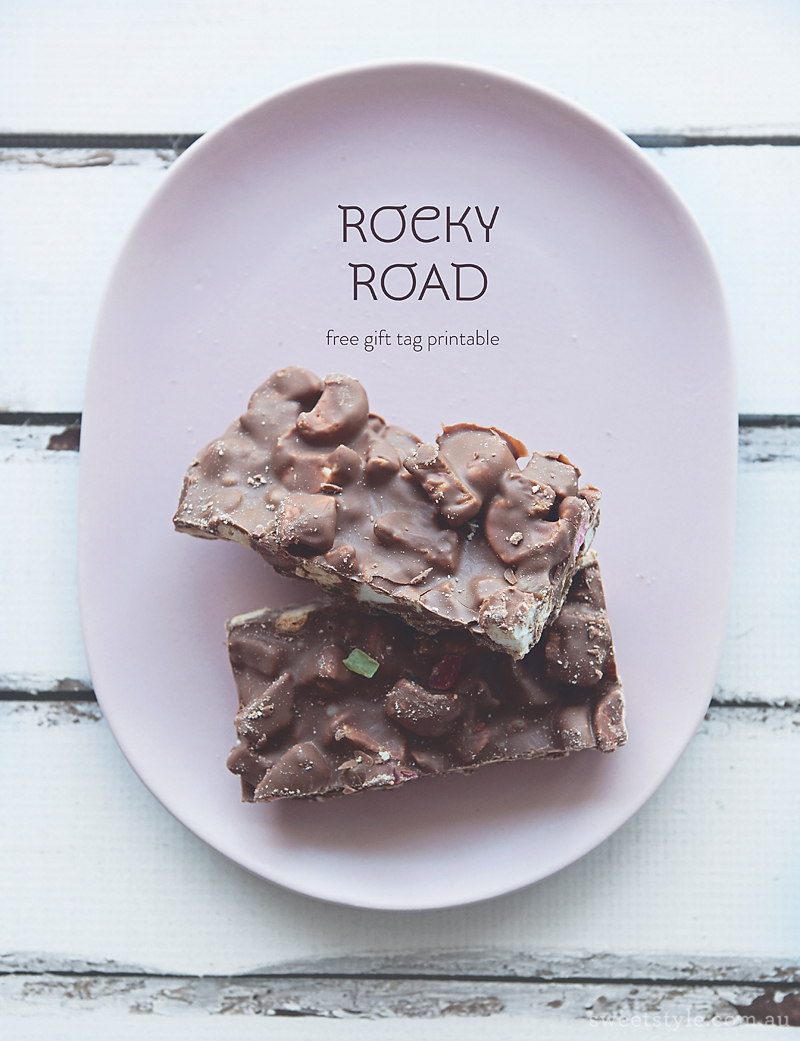
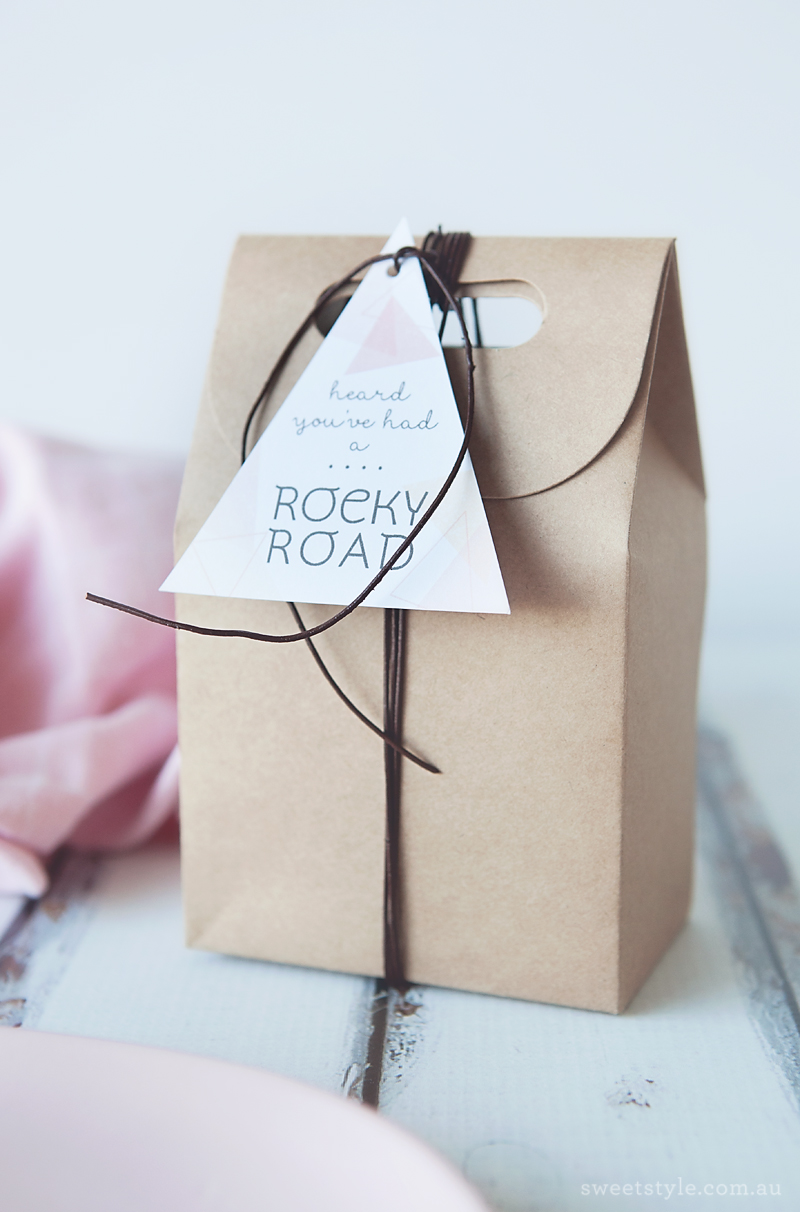
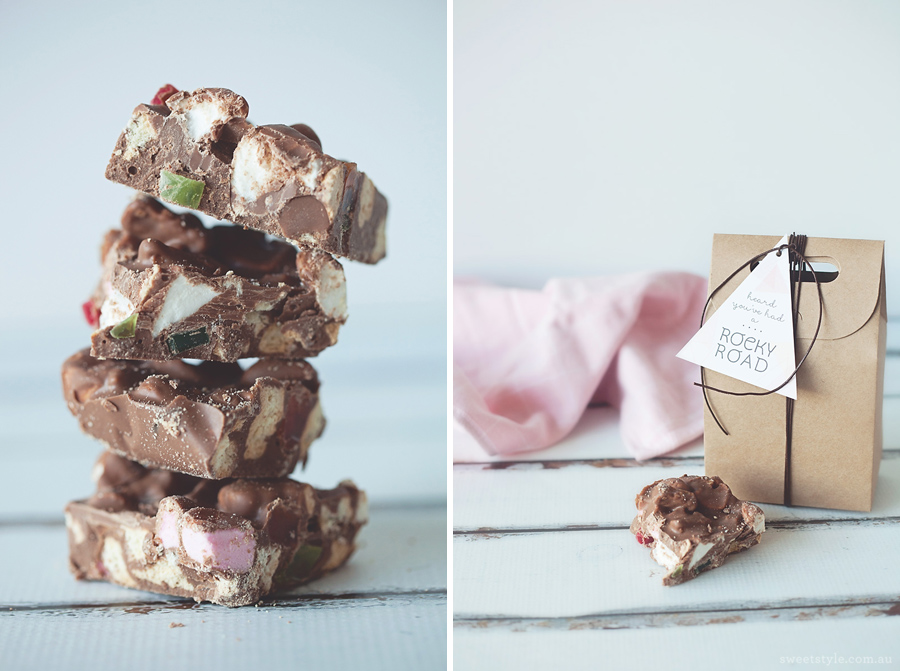
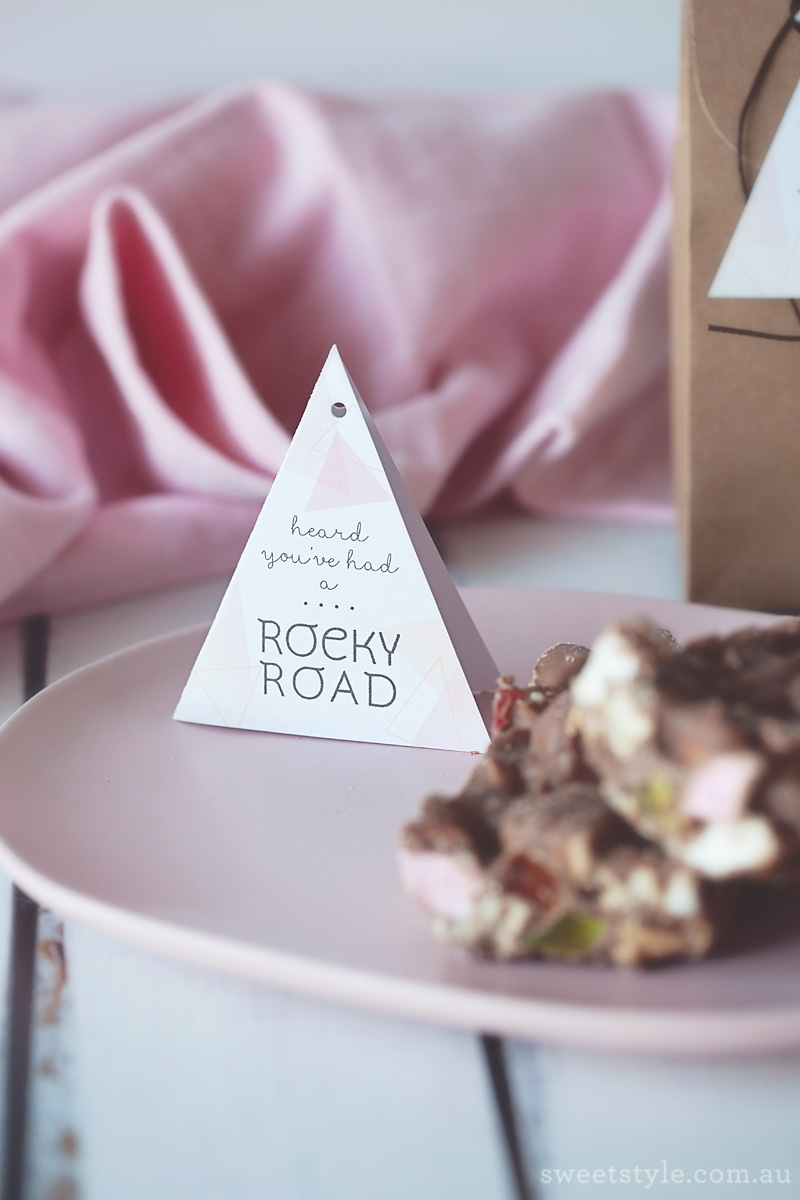
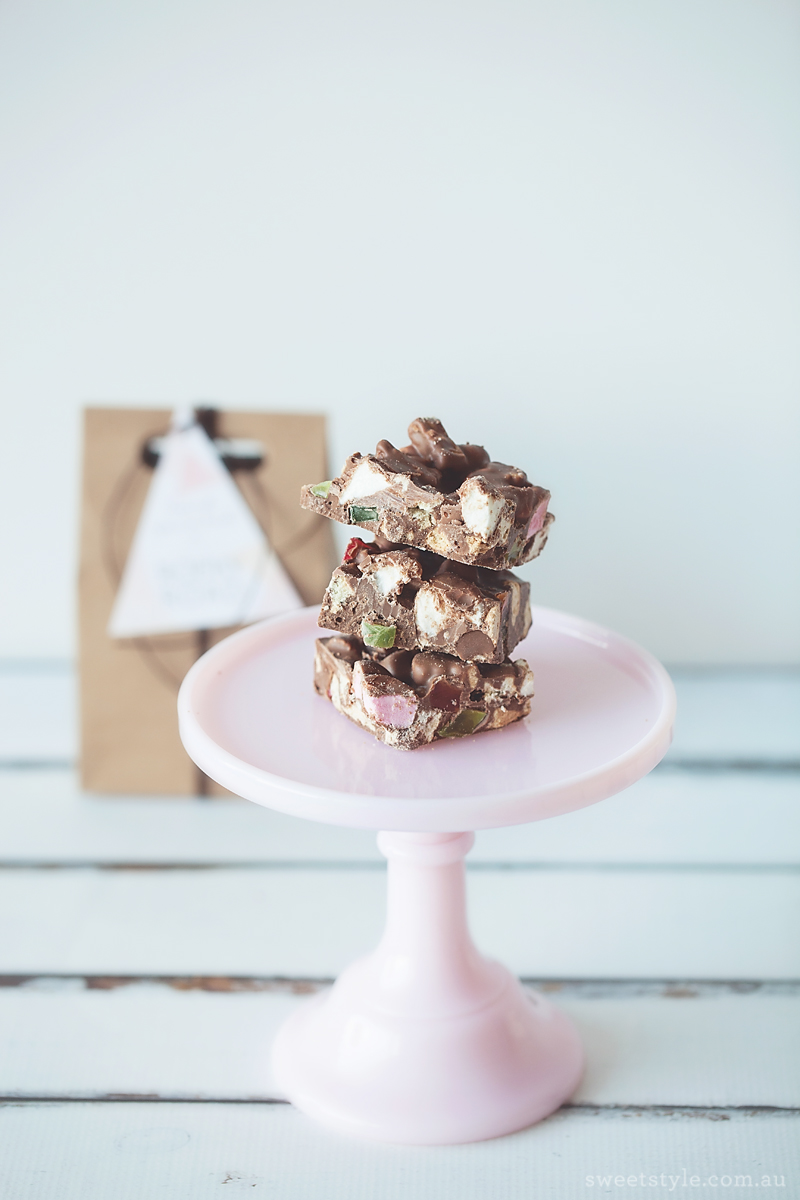
Today I am joined by my clever friend Jordan from Polkadot Prints. Jordan has put together for you a beautiful printable gift tag that is filled with lots of meaning.
The recipe for this delicious Rocky Road is also included at the bottom of the post as well as some further information about a beautiful personal project that Jordan is working on that I would love you to read more about.
Here is what Jordan told me about how her ideas came about:-
“I’ve always felt that life is full and wonderful, but there sure are valley’s and hard times eh? The past few months in my personal life have been probably some of the hardest I have faced. My, now healthy, five month old baby girl spent her first week of life in the NICU, giving us the fright of our lives. Then just a few months ago one of my younger sisters passed away in tragic circumstances. It’s through the help and kindness of friends and family that definitely make hard times a whole lot sweeter.
I designed these gift tags with the phrase “let me know if there’s anything I can do” in mind. People often don’t know what to say or do when someone is going through something, and we often don’t know how to help, but I encourage you to mix up a batch of Rocky Road and just turn up. Be there. Choccy in hand. Or leave it on a desk, at a front door, in a locker, in the letter box. It will mean more than you think it will. It’s amazing how something little can mean so much. A little bit of tangible love. Go on…go get that chocolate, download your free tags & brighten someones day today!”
You can download your free printable gift tags here.
Jordan Bariesheff is the owner and creator of Graphic Design & Stationery business Polkadot Prints. Jordan loves crafting up parties and sharing DIY ideas. She lives in sunny Brisbane with her husband and three kids. Read more about Jordan on her blog here.
Jordan has also recently launched a very special Pozible project. Please visit her campaign here to find our more about this really beautiful wall art.
Read on now for this yummy and simple recipe for Rocky Road – I hope you like our new recipe card feature which means you can print out this recipe and pop it in your recipe book.
Photography :: Leanne Ambrogio | Sweet Style
Printables :: Jordan Bariesheff | Polkadot Prints