Some exciting news to share today as the Sweet Style website is very close to being launched. There is still a bit of tweaking to do but I am delighted to announce that as well as offering my candy and dessert table service I will also have an online store which will be stocking all of the gorgeous cake stands, bowls, glassware and other lovely items for sale.
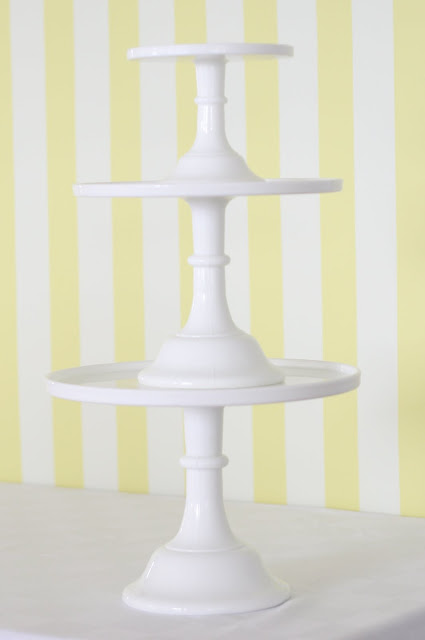
One of the most exciting items to be stocked in the store will be the gorgeous milk cake stands which I love so much. I have been using these cake stands on every table recently as they look great by themselves or stacked on top of one another – they are such an elegant and classic design.
I am now taking orders for these items due for delivery in a few weeks. I am stocking the stands in four (4) colours:
Milk
Pink
Jade
Buttercream
All four (4) colours will be available in four sizes 15cm (6″), 22cm (9″), 25cm (10″) and 30cm (12″).
I will share more with you about other items in the store very soon but
get in quick to order your favourite cake stand. At this stage email me at leanne@sweetstyle.com.au with your requirements and and I will advise further details.
Here are a few more pictures of how I have used these gorgeous cake stands recently.
I have been an avid follower of Holly Beckers Blog Decor8 for sometime and have followed her journey to create her book Decorate.
I was so excited to finally get my hands on my very own copy courtesy of Mr A and my girls for my birthday last weekend.
The pages are jam packed with loads of the most wonderful decorating tips and tricks.
As it says on the cover “1,000 inspirational design ideas for every room in your house”
The photography by Debi Trealoar is amazing and just flicking through a book like this gives me so much inspiration for both decorating and in my own photography.
There also lots of wonderful tips and quotes from the world’s leading stylists, designers, bloggers and artists.
When I am not flicking through the pages my book has taken up residence on my favourite display table as it really is such a lovely book to have out on show.
I love a birthday surprise and last week one arrived on my doorstep!
My gorgeous friend Katena (see her blog here) sent me a wonderful present which is so perfectly me.
Katena ordered this lovely print from another lovely blogger, Simone from Honey and Fizz.
Simone is now producing and selling a range of beautiful prints which you can see here.
Isn’t the blog world fabulous – not only have I made a wonderful friend in Katena who is thoughtful and generous, but she has supported another blogging friend by ordering one of her prints – so lovely to spread the love around.
If you follow my blog you will know I am a big fan of the cookie pop – they make an appearance regularly on my dessert tables. I love that they do not require you to bake a cake and they look so lovely when displayed on a cake stand or lined up on a platter.
I have had a few people ask me how I make my cookie pops so today I will give you my recipe – this recipe originally came from Linda from Bubble and Sweet and all the quantities work perfectly for me – she has a great tutorial over there is you would like to see her version. I will also give you a few more tips and tricks that have helped me. My first batch was a disaster but I persevered and practice has made perfect (maybe not perfect but not bad!) At the end of my post you can see my various combinations and creations from the past few months.
You will need
1 packet of tim tams (or Oreo’s)
80g cream cheese
1 packet of choc melts or candy melts
1 packet of lollipop sticks
First of all break up your tim tams into a food processor and then give them a quick blend.
Add the cream cheese to the tim tams and process until everything is combined.
Roll the mixture into balls and place on a lined tray.
With one of the lollipop sticks make a hole in each of the balls.
Place the tray of balls into the refrigerator to chill for at least 1 hour.
Place the packet of melts into a microwave safe jug or cup.
Melt on med-low heat in short bursts until the chocolate is starting to melted.
Dip the end of each lollipop stick into the chocolate and then into the hole in each ball so that the chocolate secures the stick. Put the balls back in the fridge until the chocolate has set (this doesn’t take long).
Continue to melt the chocolate until it is smooth and then it is time to dip.
Dip each of the balls into the melted chocolate until it is completely covered
Remove the ball from the chocolate and let the excess drip back into the bowl.
Place on a separate lined tray and if using sprinkles to decorate you need to do it now before the chocolate sets enough that they won’t stick.
A few tips I have found that make the process much easier
Allow plenty of time for each step – I usually do the first process of making the balls during the day and then at night once the house is quite I do my chocolate dipping and decorating. Sometimes I even do the balls one day and the chocolate dipping the next day.
I have used white chocolate melts, dark chocolate melts and pink wilton candy melts for all of my various pops. I can honestly say that the chocolate melting part is hit and miss for me as it is easy to overheat the chocolate. The various chocolate types also melt and perform differently – my tip here is to have some vegetable oil on hand to add to the chocolate mixture in case it does not smooth easily – copha is also great to add to help with the smoothing process. I also make sure I have lots of extra chocolate on hand just in case!
I have used tim tams but these are a very Australian biscuit – if you can’t find them use oreo cookies instead as they also work really well with this recipe.
When you dip your sticks you need to make sure you cover the entire ball – this means you really need to melt the entire packet of chocolate so that it is deep enough for dipping – I usually use a pyrex jug to melt in and I also find a deep narrow coffee mug works well.
I like to decorate my pops with coloured sprinkles to match my theme – it is important that you do this the minute you have dipped and placed each pop on your tray so the sprinkles are able to are able to stick to the chocolate before it sets. I have also found it best to do the sprinkling on a new tray as the sprinkles have a tendency to find the undipped sticks and this means the sprinkles can create lumps under your chocolate or be left in the chocolate mixture.
I usually use regular tim tams for my pops but with my easter pops I had a go at using white tim tams as I wanted to see the difference it made to the look – the white tim tams definitely made it look whiter but I think from my little survey (with my 5 year old cookie pop expert) that the regular tim tams taste nicer as they are not as sweet – white chocolate is very sweet so combined with the chocolate melts it is a definite overload!
I hope you have enjoyed my little tutorial and my tips help make your first attempt a little easier.
Here are some pictures of my cookie pops from the past few months – all quite different!
Pink pops with white, pink and yellow sprinkles for Sofia’s Bubblegum and Soda Party